STM32 Development without an IDE
STM32 microcontrollers are affordable and yet powerful. However, developing software for them with an IDE, such as Keil, is the most painful experience from the perspective of a weekend embedded hobbyist. As such, I decided to seek a way to develop STM32 apps with modern and free tools.
Why STM32?
STM32 is a family of 32-bit ARM-architecture microcontroller made by STMicroelectronics. They offer a wide range of microcontroller from the high performance F7 family to the ultra-power L0 family. ST also recently added the WB series with wireless capabilities to the STM32 family. MCUs within this family have similar instruction sets, peripherals, and even pin configurations. This post only covers the STM32L432KC controller, but it can be adopted to other STM32 MCUs by changing one or two parameters.
STM32 MCUs are cheap and highly capable devices. For example, NUCLEO-L432KC is $3.25 cheaper than an Arduino Nano with Headers. This NUCLEO board has 5 times more flash space and 10 times more Nano. It has a wide range of peripherals, such as ADC, DAC, and CAN. The hardware debugger/programmer on every NUCLEO board is a cherry on the cake.
Why don’t I want to use an IDE?
STM32 NUCLEO boards are perfect for small projects. There are great projects such as stm32duino, mbed os, and micropython for developing a simple program on STM32. However, they are designed for a wide range of MCU families. Many advance STM32 features (e.g. Direct Memory Access) are not supported.
There are many existing IDEs, such as STM32CubeIDE and GNU MCU Eclipse, for developing applications with ST and Arm’s libraries. They are powerful tools for STM32 development. However, I find these IDEs hard to use as a developer who write Python code on VS Code. The user interface is confusing and ugly. I can not use a lot of common keyboard shortcuts. The project configuration file is IDE-specific.
Terminology
- CubeMX is a tool for user to generate code for STM32 MCUs.
- GCC is a collection of tools for building applications. The most important one is the gcc compiler.
- HAL stands for Hardware Abstraction Layer. It is a library for interacting with the MCU’s hardware, such as IO pins and peripherals. The abstraction part means this library is designed to work with all MCUs in the STM32 family.
- MCU means microcontroller unit, which is a small computer with a wide range of input/output pins and peripherals.
- openocd is a tool for flashing binary applications to MCUs.
- Peripheral is a component for a specific interaction with other hardware components. For example, the ADC can measure the voltage.
- STM32 is a family of microcontroller made by STMicroelectronics.
Setup
- NUCLEO-L432KC
- Ubuntu 20.04
- All tools used in this post support Windows, macOS, and other variants of Linux as well.
Apt-get time
Like every single tutorial, let’s start with an apt install command.
sudo apt install -y openocd libncurses5 openjdk-8-jre libusb-1.0-0
openocdfor flashing and debugging programslibncurses5is a dependency of the software debugger (gdb)openjdk-8-jreis a dependency of ST’s toolslibusb-1.0for communicating with the board via USB
GCC Toolchain
We download the gcc toolchain from arm’s website. The version does not matter for a simple project. You can easily switch between different versions of gcc compilers on your computer. I downloaded the latest one.
Alternatively, you can run this in the terminal.
mkdir ~/toolchains # Feel free to choose another location
cd ~/toolchains
wget 'https://developer.arm.com/-/media/Files/downloads/gnu-rm/9-2020q2/gcc-arm-none-eabi-9-2020-q2-update-x86_64-linux.tar.bz2' -O gcc-arm.tar.bz2
tar -xf gcc-arm.tar.bz2
rm gcc-arm.tar.bz2
Remember the location of this directory for future steps. In this case, it is ~/toolchains/gcc-arm-none-eabi-9-2020-q2-update.
ST-LINK
ST-LINK is the name of the hardware debugger on the NUCLEO board. You can download the drivers and the update tool from ST’s website. You will need to create an account to download the tool.
You need enable the execution permission for the installation tool. What are udev rules? By default, only administrators in a Linux system can access USB devices. For example, you will need sudo to send a text string to a USB device. These udev rules tell Linux to allow you to communicate with MCUs from ST without the sudo permission.
cd ~/Downloads/en.stsw-link007_V2-37-26/stsw-link007/AllPlatforms/StlinkRulesFilesForLinux/
sudo chmod u+x st-stlink-udev-rules-1.0.2-2-linux-noarch.sh

sudo ./st-stlink-udev-rules-1.0.2-2-linux-noarch.sh
# Enter yes to accept
# Press the Enter key to scroll down and read the license
If you want to update the debugger’s firmware, you need to enable the execution permission before running the update tool.
STM32CubeMX
This is a graphical code generation tool for STM32. You can toggle and configure the MCU’s peripherals and other hardware with this tool. We will use this tool to export ST’s driver code, HAL, and other low-level libraries. It is a bit hard to use. I find the number of switches overwhelming. In a future post, we will remove the need of using this application
You can download this tool from ST’s website.
Then, unzip the package.
unzip en.stm32cubemx_v5-6-1.zip -d cubemx
We need to give the execution permission to the installer.
sudo chmod u+x ./SetupSTM32CubeMX-5.6.1.linux
Run the installer and follow the instruction. The installation location does not really matter. In this post, I will use the default ~/STM32CubeMX
./SetupSTM32CubeMX-5.6.1.linux
Nice. Now you will find an executable under ~/STM32CubeMX/ named STM32CubeMX.
This is what you will see when you run it.
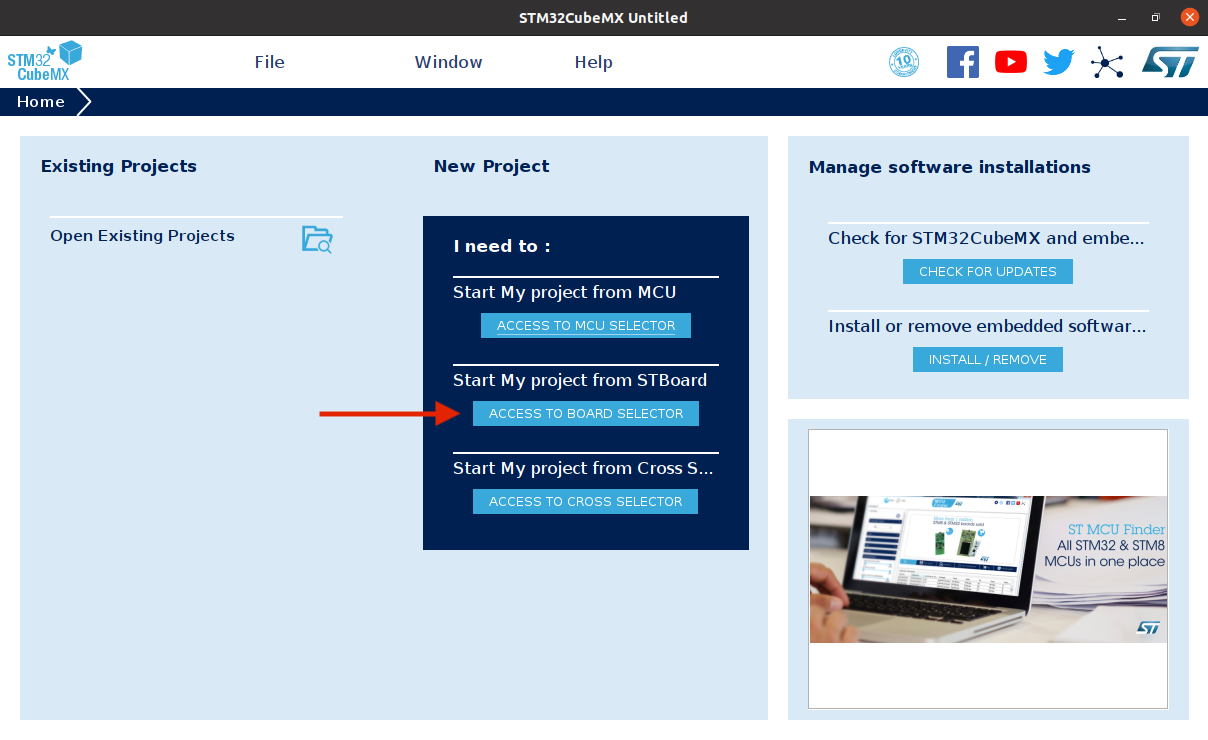 We will click on the “ACCESS TO BOARD SELECTOR” button since we are using a NUCLEO board.
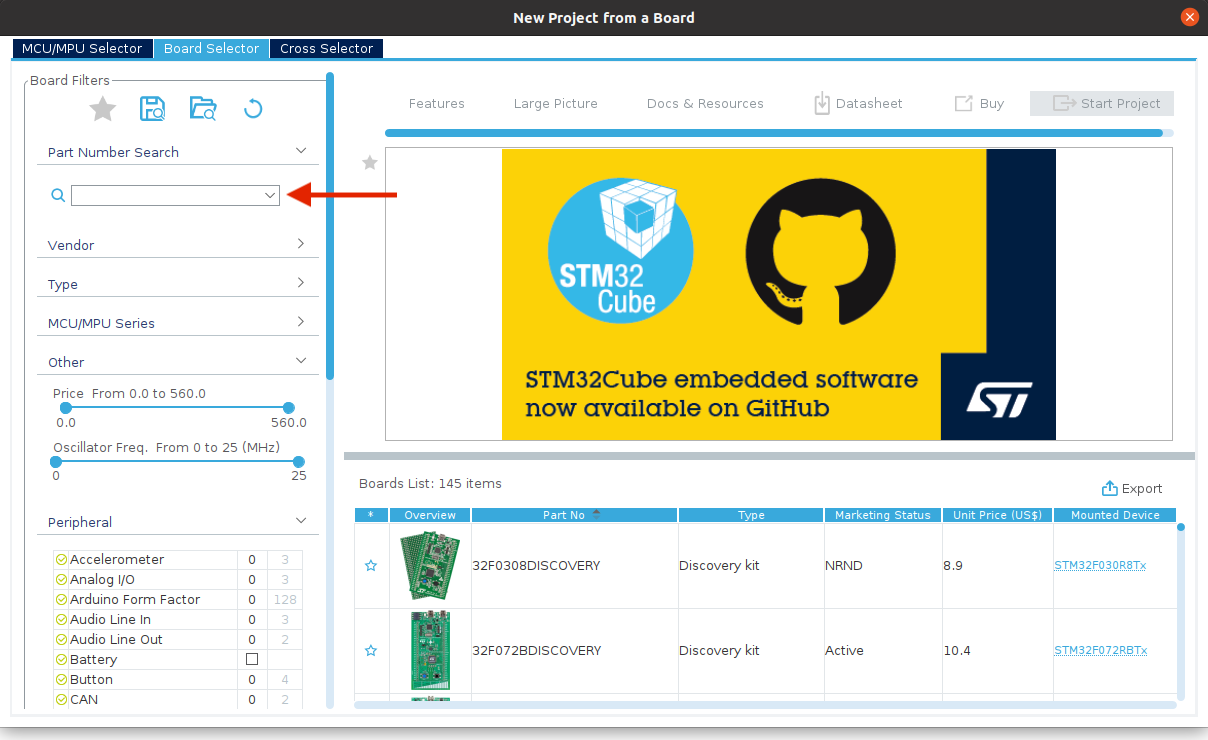 Type in “L432KC” in the “Part Number Search” to find our board.
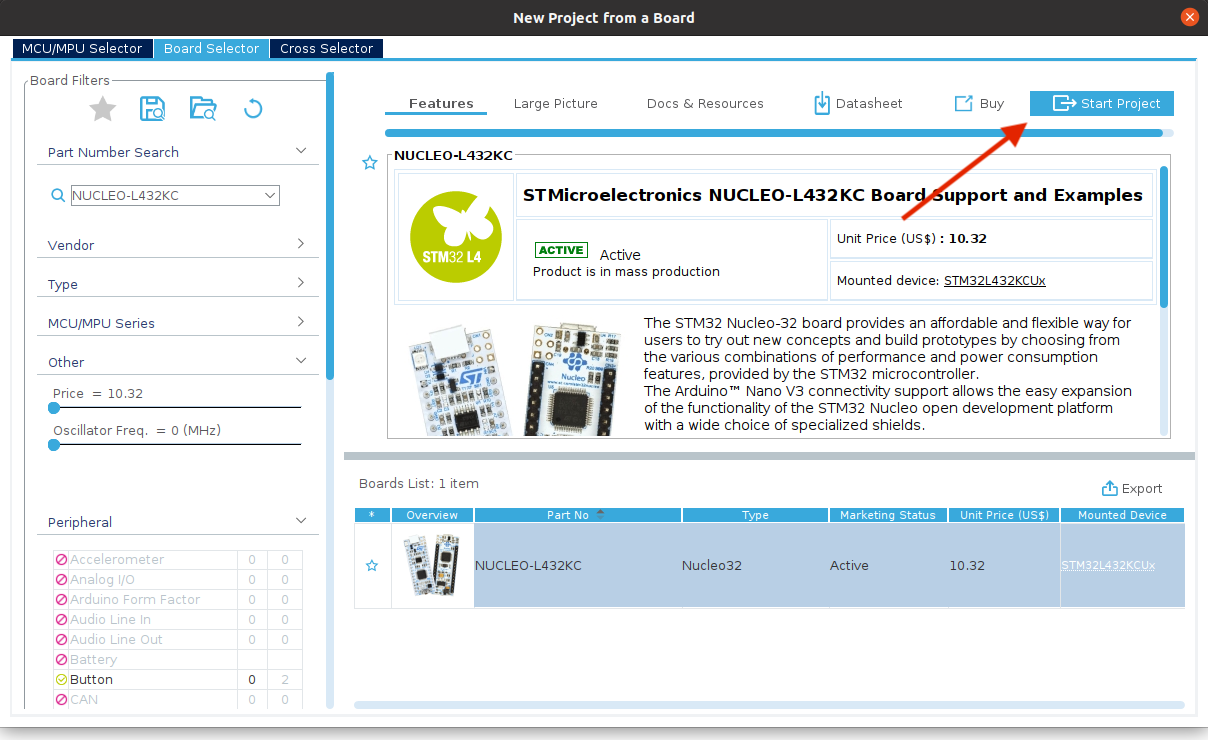 Click on “Start Project” to create a new project.
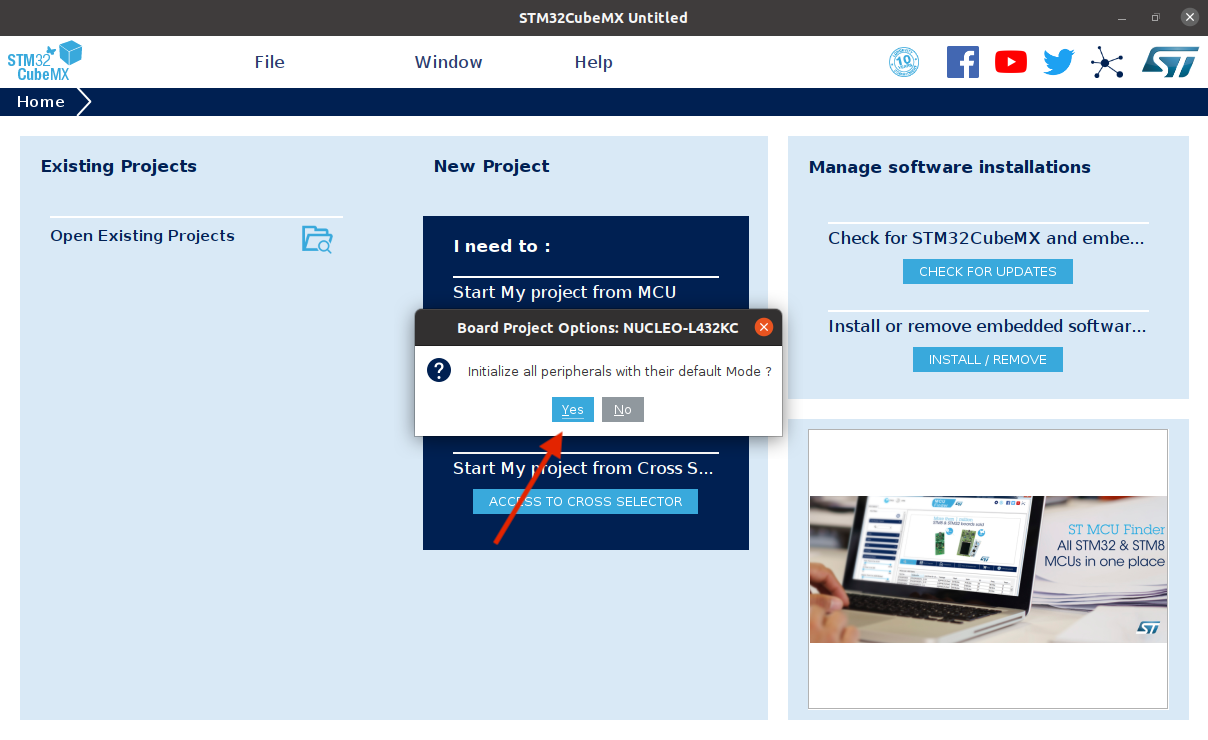 Say “Yes” to initialize the peripherals with their default mode. This will enable the LED pin (important for the light part), setup the system clock (important for blinking part), and enable the UART controller (important for saying hello world via the USB).
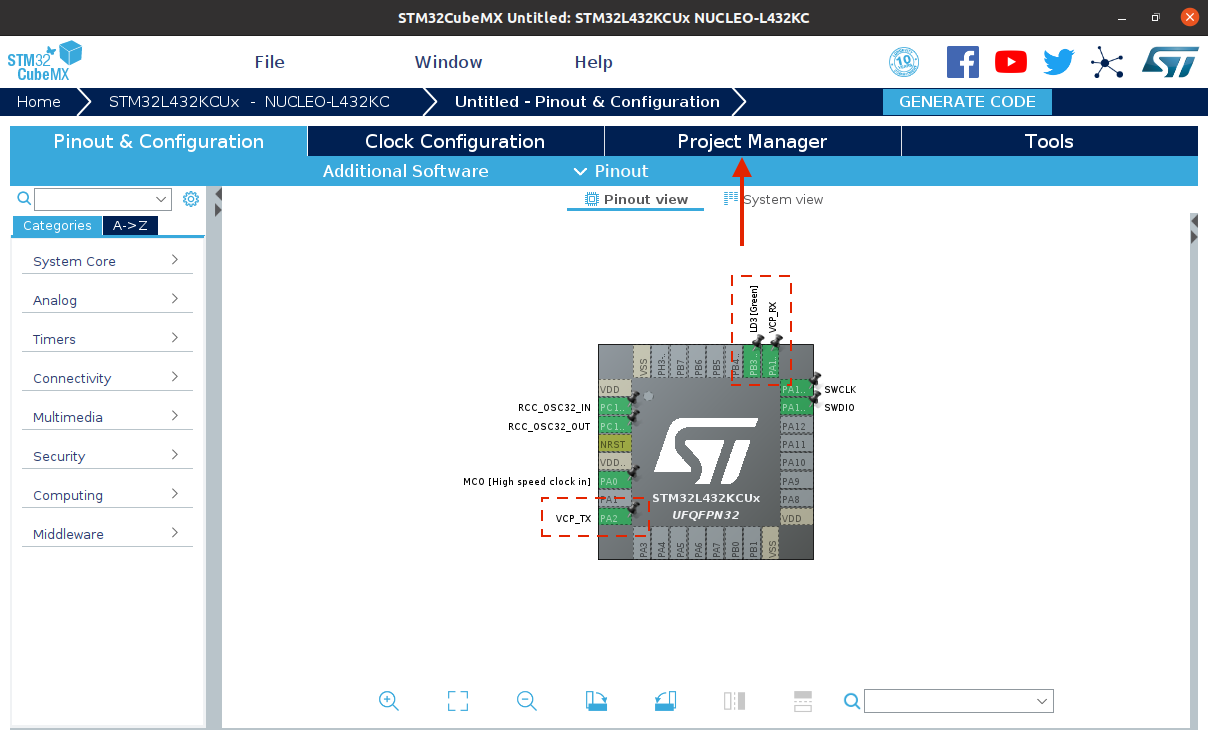 There are a few important green pins for us. LD3 is giving power to the on-board LED. VCP_TX is for sending text to the computer. VCP_RX is for reading text from the computer.
Then, we click the “Project Manager” tab to pick the location of the generated project.
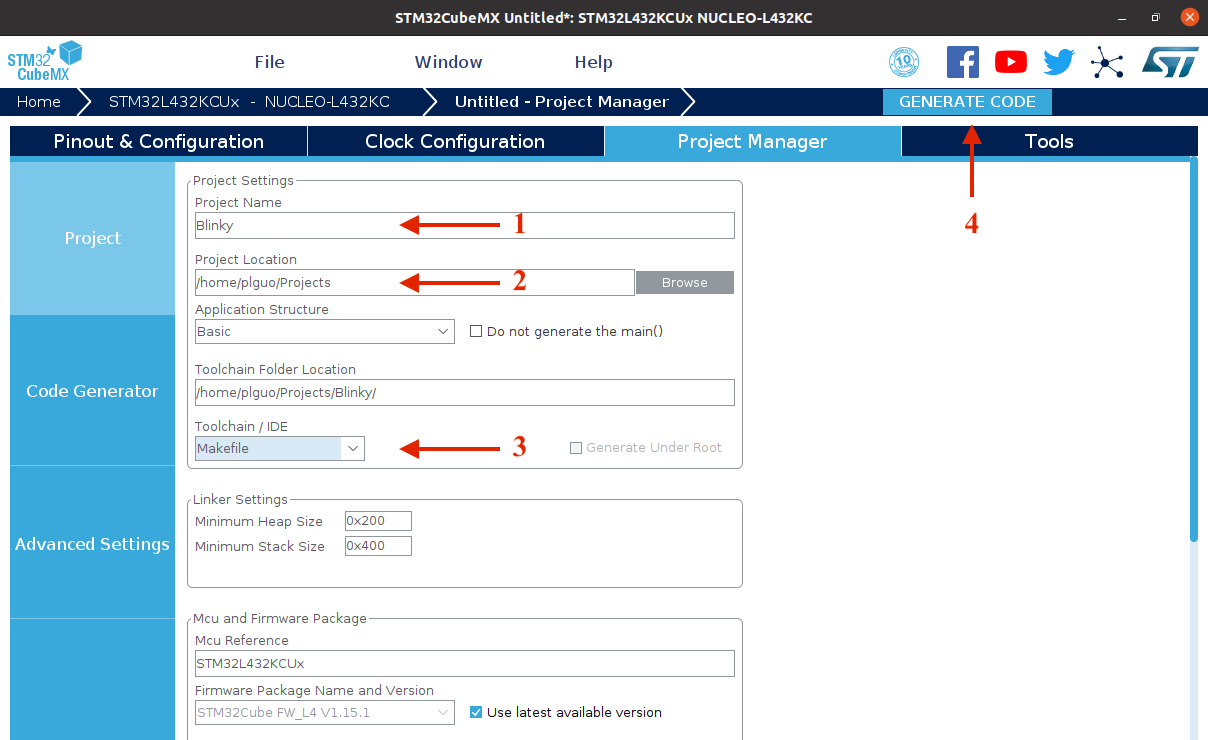 We set the “Project Name” to “Blinky”. Set the project location to the parent directory for Blinky. Remember to change the “Toolchain/IDE” to “Makefile”.
Once you are ready, smash the “GENERATE CODE” button.
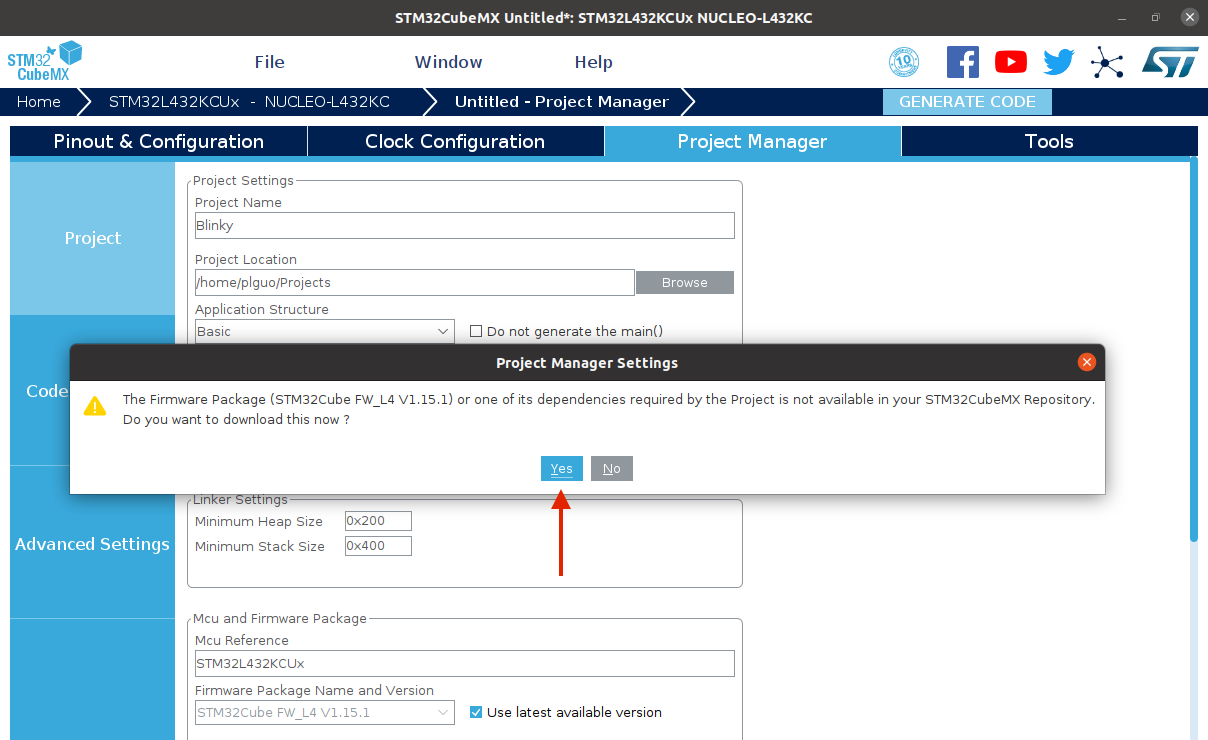 If it asks you “do you want to download the firmware package”, say “Yes”. We need the libraries in this package.
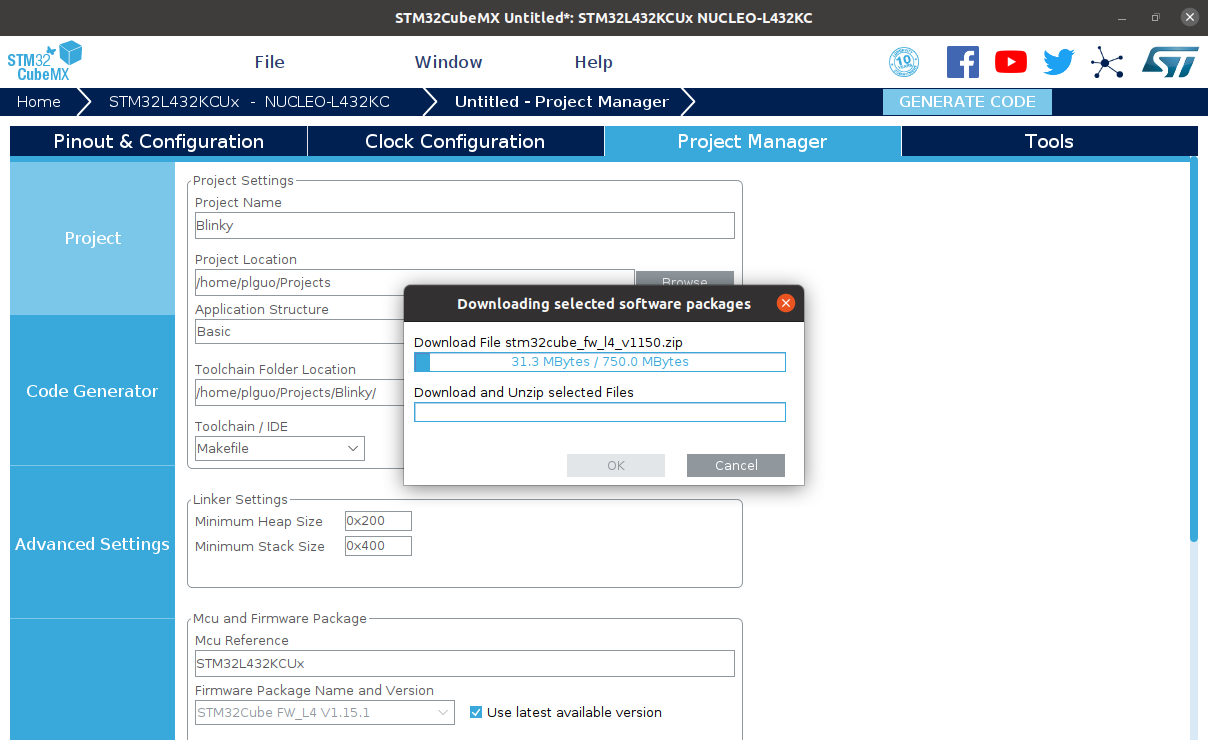 It is a sizeable package. Take a coffee break and come back for the next section.
Project structure
Go the location of the project. You will see this file structure.
Blinky
│── Drivers
│    │── CMSIS
│    │── STM32L4xx_HAL_Driver
│
│── Inc
│    │── main.h
│    │── stm32l4xx_hal_conf.h
│    │── stm32l4xx_it.h
│
│── Src
│    │── main.c
│    │── stm32l4xx_hal_msp.c
│    │── stm32l4xx_it.c
│    │── system_stm32l4xx.c
│
│── Blinky.ioc
│── Makefile
│── startup_stm32l432xx.s
│── STM32L432KCUx_FLASH.ld
CMSISis arm’s low-level libraries for interacting with the hardware.STM32L4xx_HAL_Driveris ST’s low-level libraries for interacting with the hardware.main.candmain.hare the main source files for initialization and the main loop.stm32l4xx_hal_conf.hthis is the configuration file for the STM32L4 family and the project. This is how you tailor the STM32 HAL library for your MCU and project.stm32l4xx_it.candstm32l4xx_it.hcontain the interrupt handlers. All functions for handling the events and unexpected errors are here. We will cover interrupt in another post.stm32l4xx_hal_msp.cMSP stands for MCU Support Package. They are functions for setting up and gracefully shutting down peripherals.system_stm32l4xx.cThis file configures the system during initialization, such as setting up the system clock.Makefileis a script that tells your computer how to build the application for STM32.startup_stm32l432xx.scontains low-level assembly code for starting up the application.STM32L432KCUx_FLASH.ldlink script. Compiler compiles each source file to an object file. This script tells the compiler (or linker) how to mesh these files into one file for STM32.
Modifying the code to blink
Open the main.c source file. The amount of code and comments are overwhelming. Let’s focus on a few lines in the main function.
Find the main loop and add these two lines.
 int main(void)
 {
   /* Lines and lines of generated code and comments... */

   /* Infinite loop */
   /* USER CODE BEGIN WHILE */
   while (1)
   {
     /* USER CODE END WHILE */

     /* USER CODE BEGIN 3 */
+    HAL_GPIO_TogglePin(LD3_GPIO_Port, LD3_Pin);
+    HAL_Delay(500);
   }
   /* USER CODE END 3 */
 }
The first line tells the LED to turn on if it is off. If the LED is already on, it will turn off the LED. The second line tells the MCU to wait for 500 milliseconds.
Compiling with GCC ARM
Add the gcc compiler to the PATH.
export PATH=~/toolchains/gcc-arm-none-eabi-9-2020-q2-update/bin:$PATH
You may also just set the GCC_PATH env variable for make.
export GCC_PATH=~/toolchains/gcc-arm-none-eabi-9-2020-q2-update/bin
Run make in ~/Projects/Blinky
cd ~/Projects/Blinky
make
If you see this line, you are all green to flashing the program
.../toolchains/gcc-arm-none-eabi-9-2020-q2-update/bin//arm-none-eabi-objcopy -O ihex build/Blinky.elf build/Blinky.hex
Flashing with OpenOCD
Check if the system can see the debugger
lsusb
You should be able to see this line
Bus 001 Device 005: ID 0483:374b STMicroelectronics ST-LINK/V2.1
You need a script to tell openocd how to flash the program to a specific MCU. Fortunately, openocd comes with scripts for variety of MCUs. You can see all of them here.
ls /usr/share/openocd/scripts
The board/st_nucleo_l476rg.cfg script is compatible with the STM32L4 family including our L432KC board.
Let’s double check if openocd can talk to the board.
openocd -f board/st_nucleo_l476rg.cfg -c targets -c shutdown
-c targetstells openocd to list all connected devices-c shutdowntells openocd to shutdown after the listing all devices and do not wait for another command.
The all-in-one flash command is the program function. This tells openocd to flash the program, verify the flashed binary is correct, reset the state of the MCU, and exit when it is done. Checkout the documentation for more details.
openocd -f board/st_nucleo_l476rg.cfg -c "program build/Blinky.elf verify reset exit"
programmeans flash the binary and do other related stepsbuild/Blinky.elfis the path to the application binaryverifymeans verifying the flashed memory banks against the binary file (i.e. Blinky.elf)resetmeans reset the MCU and then run the applicationexitmeans shutdown openocd once it is done
Here you go. The LED should be blinking now.

Debugging with GDB
The best way for debugging a program is printf, the second-best way is using a debugging tool like gdb. We can start the debug session by running openocd in a terminal. Since we do not have the -c shutdown command, openocd will start a server and wait for other tools to interact with the MCU.
openocd -f board/st_nucleo_l476rg.cfg
We then start the gdb program in another terminal while keep the openocd running. If it is already in your PATH, you can simply run this.
arm-none-eabi-gdb
Or you can specify the full path.
~/toolchains/gcc-arm-none-eabi-9-2020-q2-update/bin/arm-none-eabi-gdb
Run this command to load the executable symbols for the debugger.
(gdb) file build/Blinky.elf
Connect to the openocd server.
(gdb) target remote localhost:3333
Tell openocd (i.e. monitor) to reset the program to the starting state and wait.
(gdb) monitor reset halt
Set a breakpoint at the main function.
(gdb) b main
Continue to execute the program. In this case, it will start to execute from the beginning.
(gdb) c
Once GDB hits the beginning of the main function, use the next command to walk through the function.
(gdb) n
You can add a breakpoint to a line in any source file. In this case, we will add a breakpoint to line 103 in the main file. This is where the program calls the HAL_GPIO_TogglePin function.
(gdb) b main.c:103
You can see the list of breakpoints by calling.
(gdb) info b
Once you have enough fun, tell openocd to shutdown.
(gdb) monitor shutdown
Quit gdb by this command.
(gdb) q